
Not the best pic of the pool area but you get the idea!
So basically we were left with a pit of sand and rocks in the middle of our yard. Flash forward a year (the inside projects took precedence over the outside for the first year!) of weeds growing in this sand/rock mess and you do not have a BBQ ready yard!!
My mom, a veteran DIY'er, suggested creating a patio since there was a walkway out to where the pool used to be and sand is the base layer that you would start with for a patio project anyway.
Unfortunately, I don't have a pic of the weedy mess that the area was before cleaning it up to get the full transformation.
For this project you will need: pavers, sand bags, a level, a 2x4 or larger, hand tamper, a lawn roller, paver edging, man power and lots of patience!
-Obviously the first step was to clear out any weeds and rocks.
-My mom the math teacher came up with the layout and pattern of the patio (you need to make sure whatever pattern you are using will fit within the overall dimension). Then you can calculate exactly how many pavers you need
-Next, we leveled out the area with some extra space around to work with. Using the hand tamper and lawn roller, make sure the area is level and the sand is packed down well. You may have to add sand bags and level with your 2x4 then pack the sand down again and repeat this process until totally level.

- You can use stakes and string to measure out and mark the exact dimensions of your patio. You would then start your first row of pavers in your pattern.
-Each row must be carefully placed, take your time measuring or you will be sorry later having to take up whole rows to fix this (unfortunately, I know this from experience!!)

My wonderful momma and I posing here with most of the pavers unloaded by myself, my dad and my strong hubby! If I remember correctly it was 90 degrees and up this whole week! Don't forget lots of water, sunscreen and breaks in the shade!!!
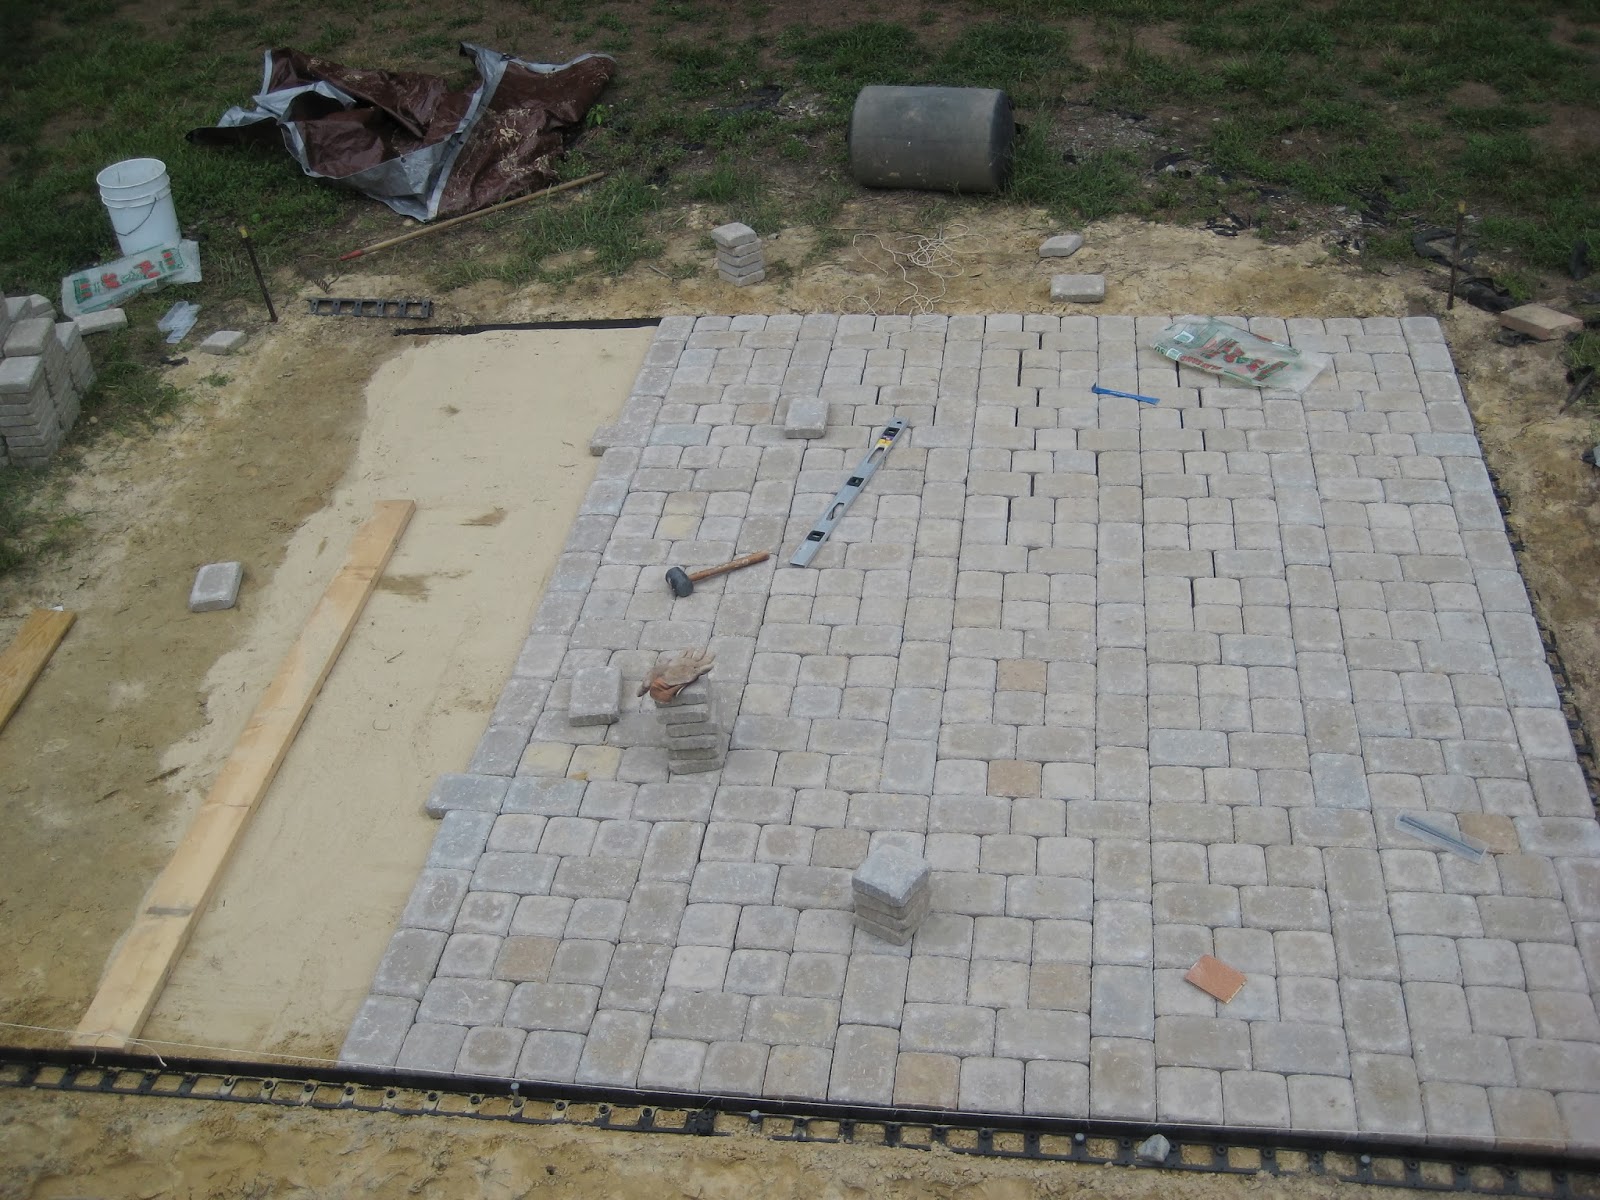
This was after many hours of hard labor and meticulously placing each row, being careful not to step in the packed sand too much!
As you can see, we used the paver edging (black strip on either side of patio). This helps keep the patio design in place as your working and also prevents weeds and grass from creeping up into your patio later!!


As you can see in the above picture to the left, we had to match up the walkway that was previously leading up the the pool area. This required taking up several rows of the walkway and adjusting the curve to match up just right.
When you are done laying out your patio and have placed the edging on the last side, you will need to sweep sand over the top of the whole patio. Your hardware store sells a special type of sand for this layer that helps seal and fill in the cracks of the patio (can't remember exactly what brand I used)
When you are finally done your patio you just need to clean up around it, plant grass or your garden, place furniture, then kick back and relax!!!!
Finished product!!!!!

No comments:
Post a Comment